


The $39.99 Kid’s Coding Machine: Setting Up the Raspberry Pi 400
After I shared on Facebook that Micro Center has the Raspberry Pi 400 for just $39.99, my messages filled up with questions about what it really is and how to set it up as a learning station for kids. Here’s the thing, if you want your kids to learn how to build and understand technology instead of just using apps on a tablet, this is usually the simplest and most budget-friendly way to dive in.
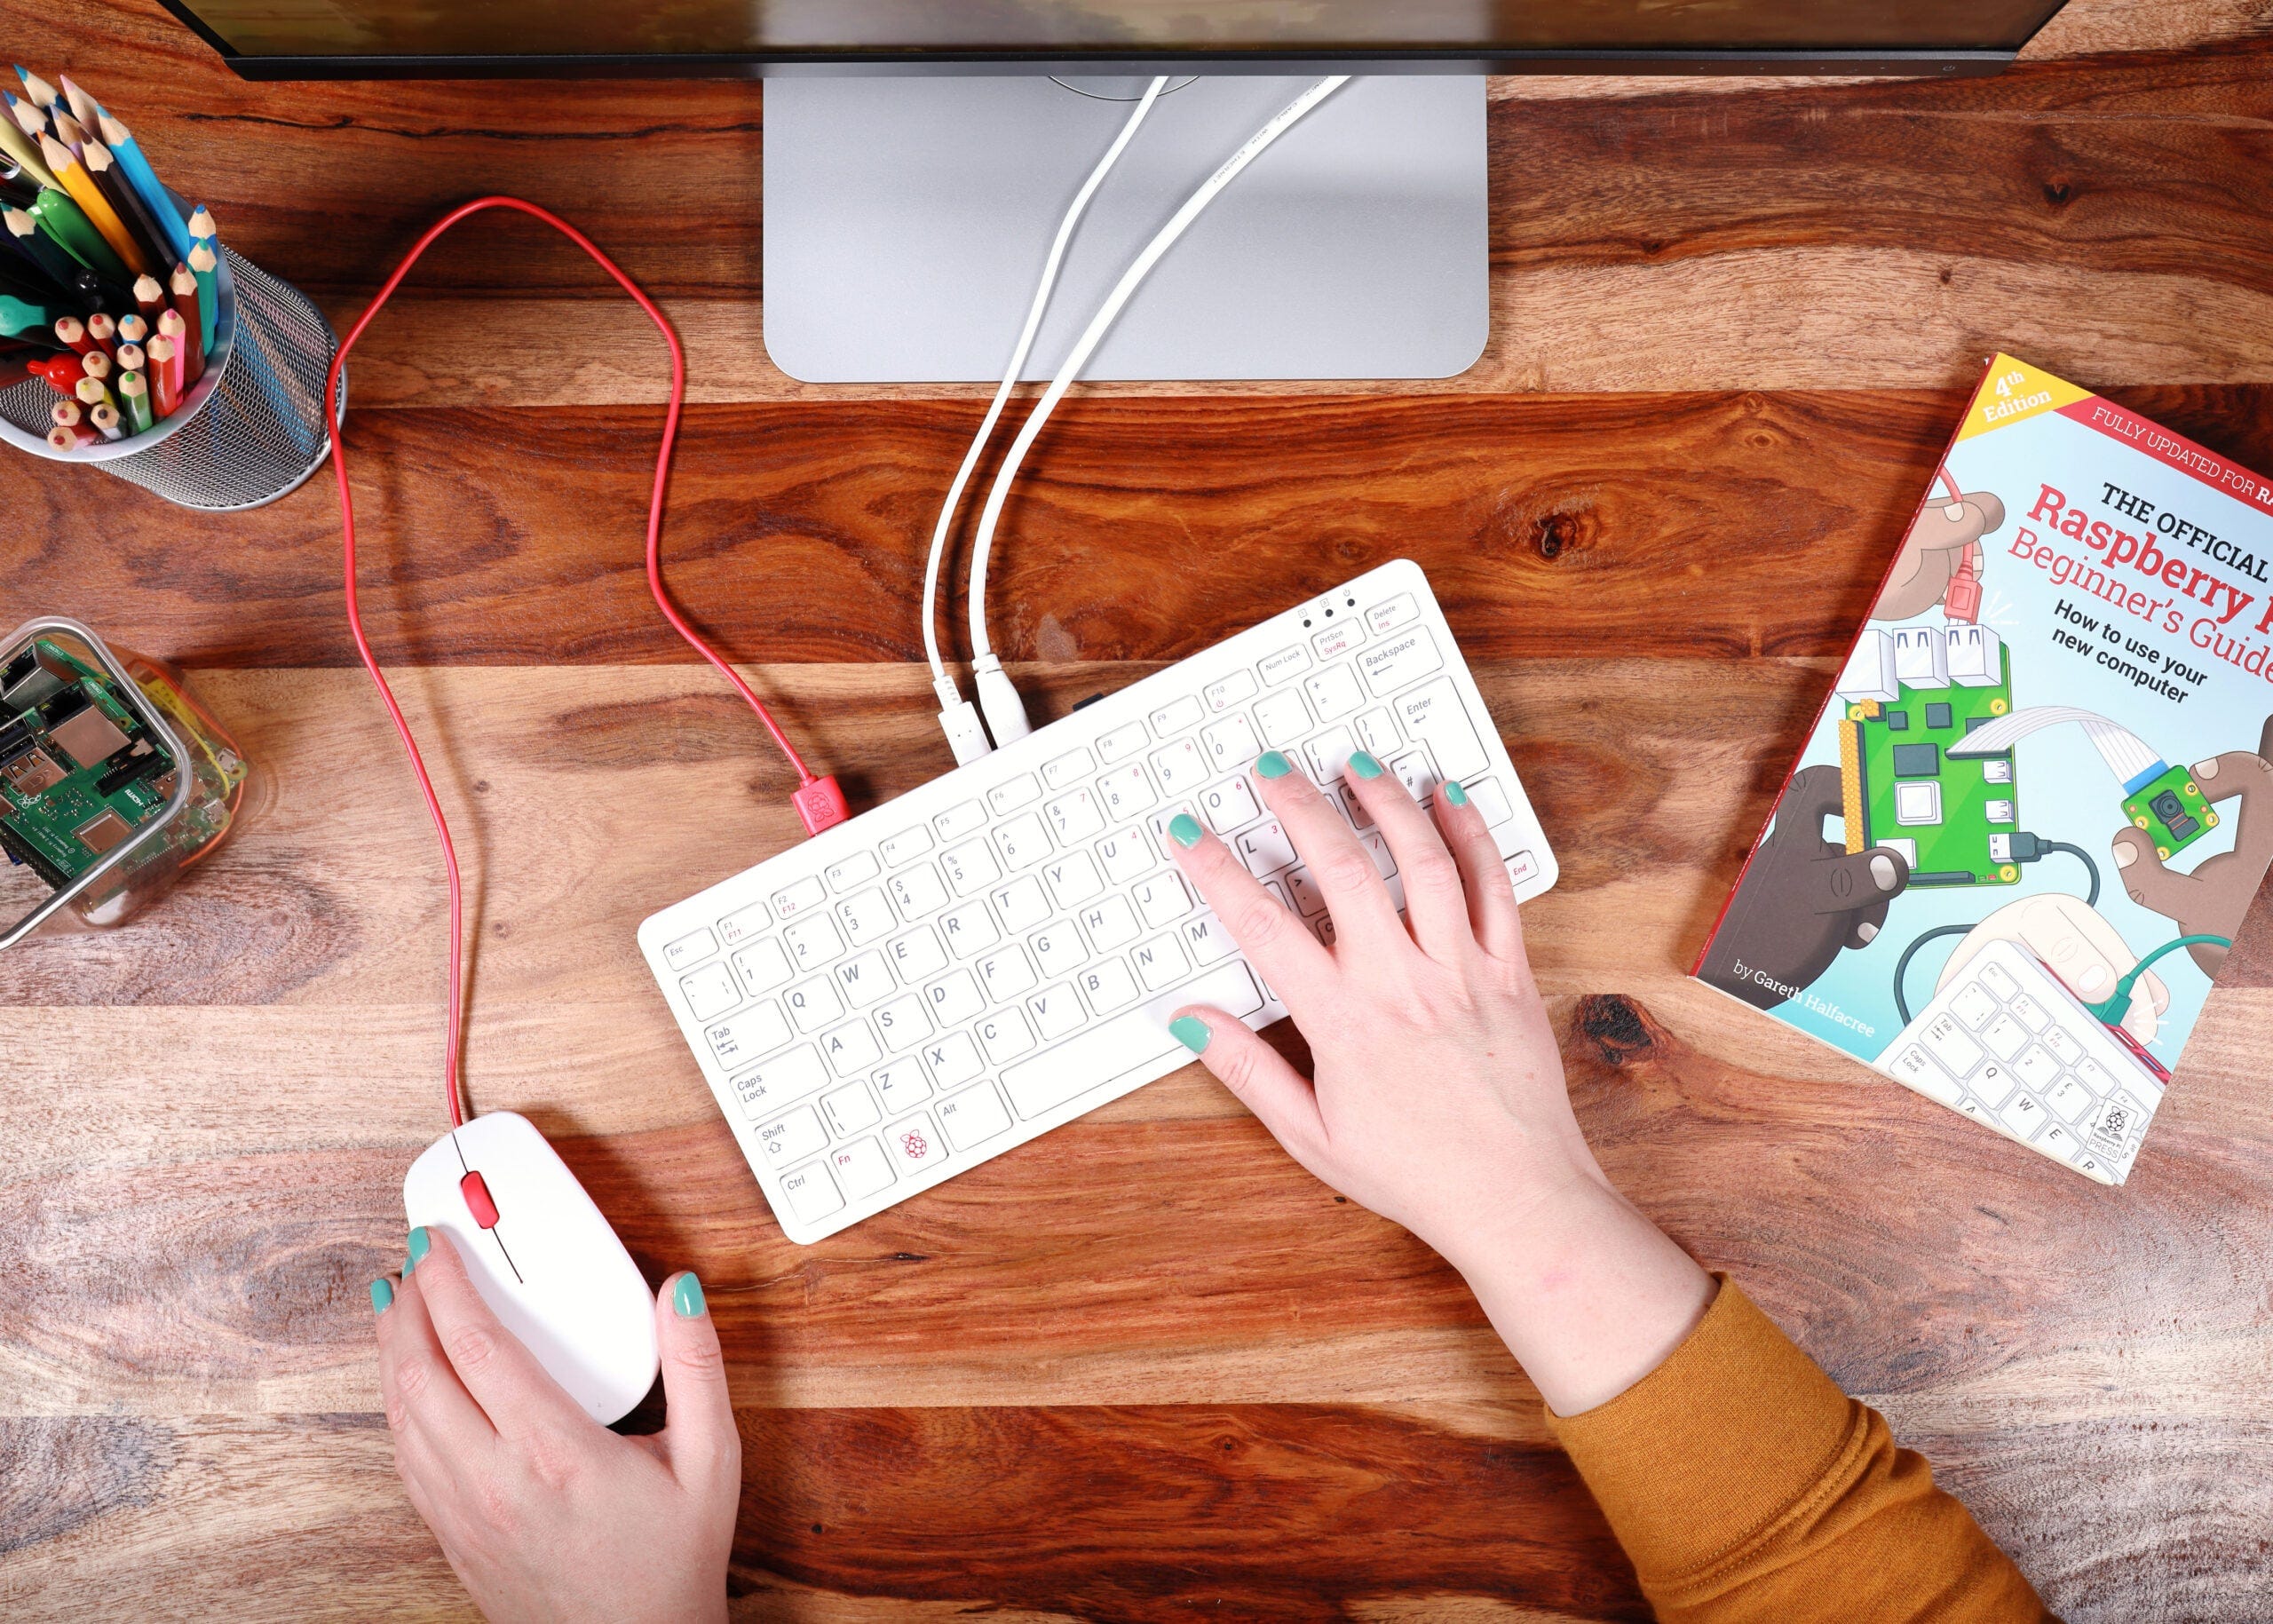
So, what is the Raspberry Pi 400?
Think back to those classic home computers from the ’80s like the Commodore 64, where the whole computer was built right into the keyboard. The Raspberry Pi 400 is kind of a modern take on that idea. Inside a compact 78-key keyboard, it packs a 1.8GHz quad-core processor, 4GB of RAM, built-in Wi-Fi and Bluetooth, two micro-HDMI ports that can power dual 4K monitors, three USB ports, and on the back, a 40-pin GPIO header for hooking up LEDs, sensors, or robotics projects.
Because the motherboard is sealed inside the keyboard with a big heatsink, it runs totally silent—no fan noise—and there are no exposed circuit boards for little hands to accidentally mess up.
Continues below…
What Extra Gear Do You Need?
If you grab the $39.99 standalone unit at Micro Center (instead of the $100 Complete Kit), check the box before you leave the aisle. Some standalone boxes include a pre-loaded MicroSD card, while others are strictly the keyboard. To get it running on a TV or monitor, make sure you have:
MicroSD Card: At least 32GB (Class 10 / A1 or A2 rated for fast booting).
Power Supply: A 5V/3A USB-C power adapter (a standard phone charger often lacks the wattage; grab the official Raspberry Pi USB-C power supply for about $8).
Display Cable: A Micro-HDMI to standard HDMI cable.
Mouse: Any wired USB or Bluetooth mouse.
Choosing the Best Operating System (OS)
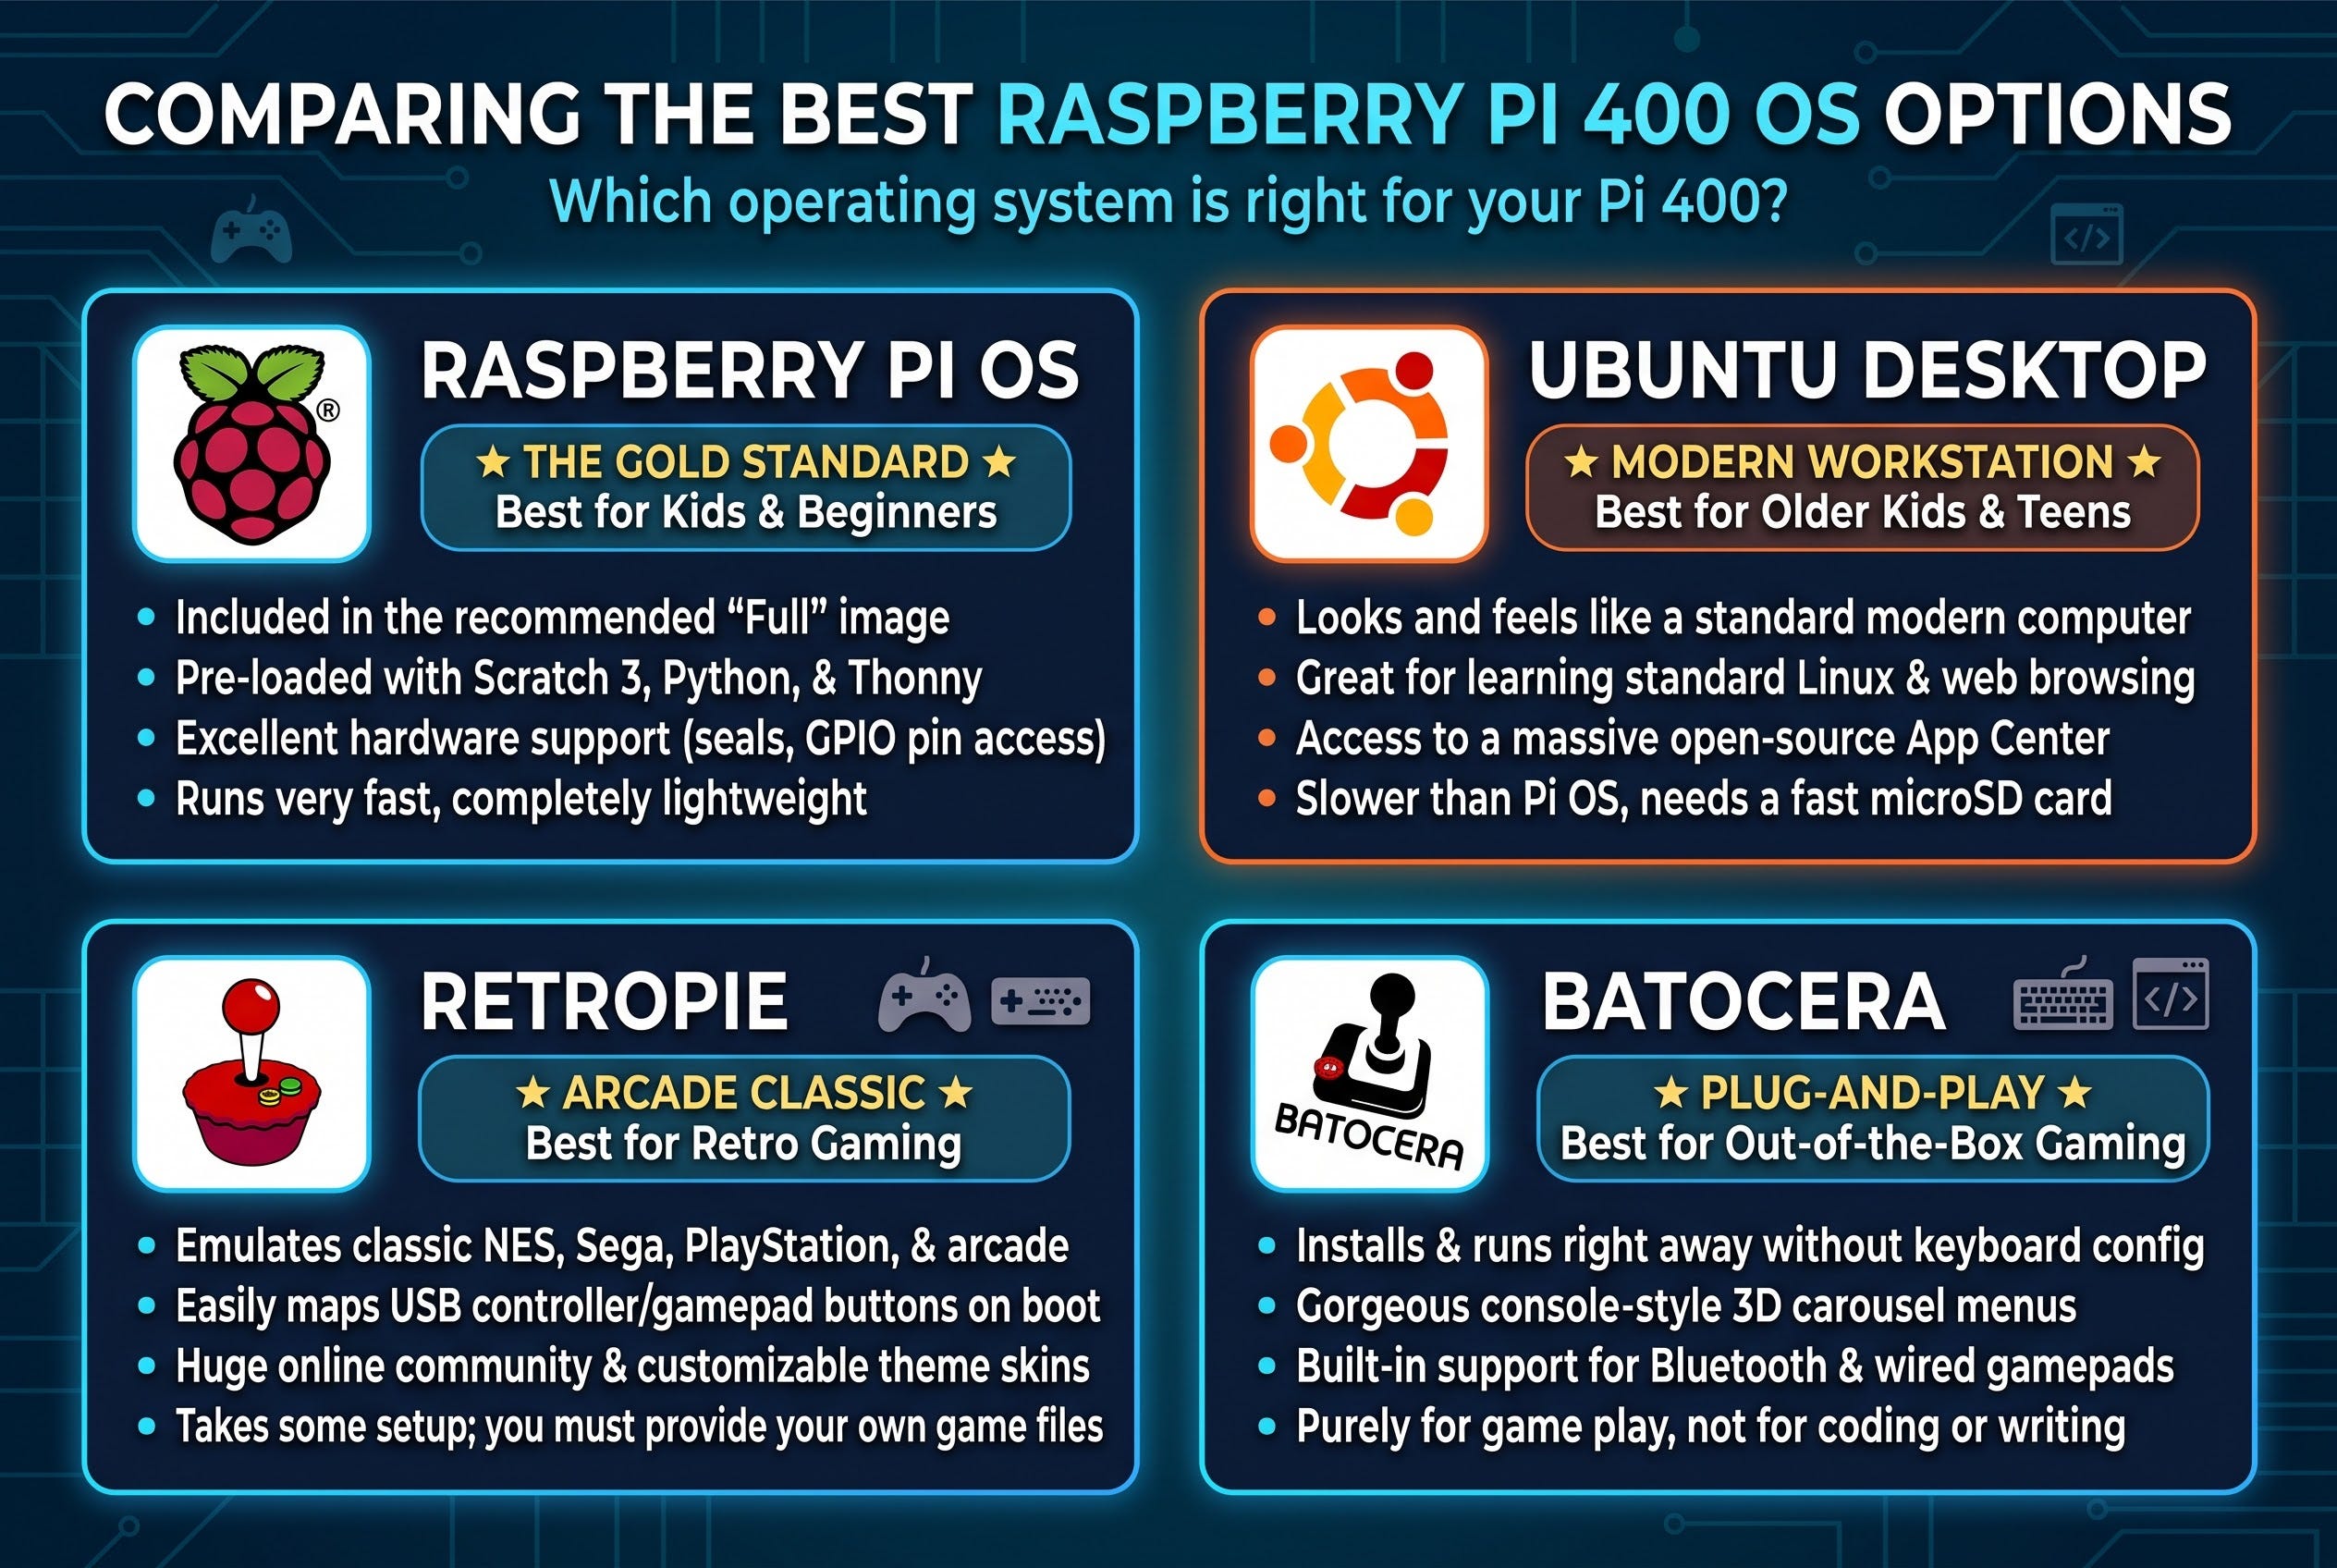
The Pi 400 runs off a MicroSD card, which means you can swap its entire personality in ten seconds just by swapping the card. Using the free Raspberry Pi Imager tool on your main PC or Mac, you can flash any of these systems onto a card:
Raspberry Pi OS (Full 64-bit Recommended): The gold standard for kids. It looks like a clean, lightweight Windows or Mac desktop and comes pre-loaded with educational coding tools, offline Scratch 3, Python editors, and LibreOffice for schoolwork.
Ubuntu Desktop: A heavier, modern Linux desktop. Better suited for older kids or teens who want a full desktop OS experience and plan to dive deeper into standard software development.
RetroPie / Batocera: Keep a second $8 MicroSD card handy with one of these installed. When coding time is over, swap the card, plug in a USB gamepad, and the keyboard transforms into an arcade machine that emulates classic NES, SNES, and Sega Genesis games.
Kano OS / Twister OS: Fun community alternatives that add gamified interfaces or themes that mimic Windows 10 or macOS if your child prefers a familiar look.
Step-by-Step Setup: From Box to Scratch Coding
Flash the SD Card: Download and open Raspberry Pi Imager on your regular computer, and plug in your MicroSD card. Click Choose Device (select Raspberry Pi 400), click Choose OS (select Raspberry Pi OS (other) and pick Raspberry Pi OS Full so all coding apps come pre-installed), and click Choose Storage to write it to your card.
Plug and Boot: Insert the MicroSD card into the slot on the back of the Pi 400, connect your mouse and Micro-HDMI monitor cable, and plug in the USB-C power cord last (there is no power button—it boots the moment power connects).
Complete the First-Boot Wizard: Follow the on-screen prompts to connect to your home Wi-Fi, set your timezone, and create a username and password.
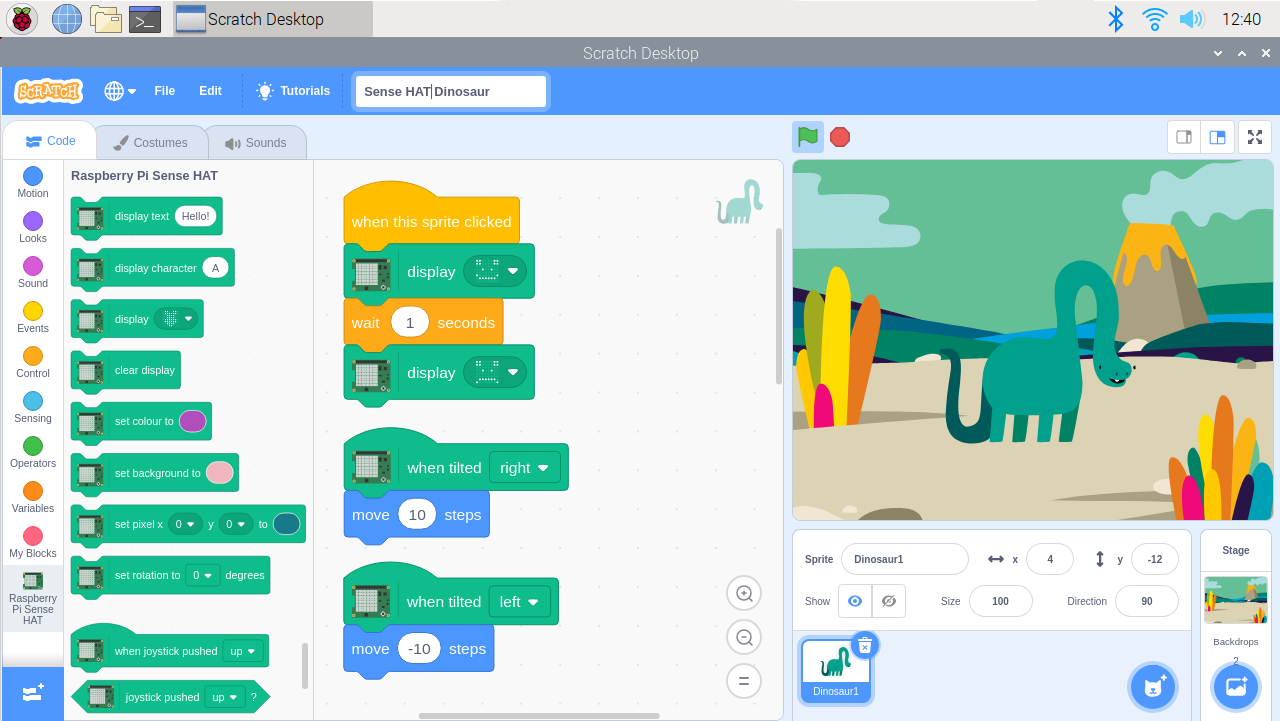
Launch Scratch 3: Click the Raspberry Pi icon in the top-left corner of the screen, hover over Programming, and click Scratch 3. (If you installed the standard OS instead of the Full version, go to Raspberry Pi Icon - Preferences - Recommended Software, check the box next to Scratch 3, and click Apply to install it).
Build a 60-Second First Game: Inside Scratch, kids drag and snap color-coded puzzle blocks together instead of typing complex syntax. Have them drag a yellow When Green Flag Clicked block from the Events tab into the workspace, snap a blue Move 10 Steps block (Motion) underneath it, and add a purple Say "Hello!" for 2 seconds block (Looks). Click the Green Flag above the stage, and they have officially written their first program.
Beyond Scratch: What Can They Learn Next?
Once your kids master making animations and games in Scratch, the Pi 400 scales right along with them without needing new hardware:
Physical Computing in Scratch: Inside Scratch 3, click the Add Extension button in the bottom-left corner and select Raspberry Pi GPIO. Kids can use those same drag-and-drop blocks to make real physical LEDs blink or trigger buzzers wired to the back of the keyboard.
Thonny Python IDE: Pre-installed under the Programming menu, Thonny is a beginner-friendly editor that eases kids from visual block coding into real text-based Python—the same language used in professional software and AI.
Minecraft Pi: A special version of Minecraft where players use Python code to instantly build massive structures and manipulate the game world.
At $40, it costs less than a single video game, takes ten minutes to set up, and gives kids their own dedicated workspace where they can experiment, break things, and learn how computers actually work.